I. Introduction
Raspberry Pi is a powerful, compact embedded Linux computer that can perform a wide range of tasks typically associated with a full-fledged desktop system. Its affordability and ease of use have made it a favorite among hobbyists, developers, and educators alike. On the other hand, Arduino is a versatile microcontroller platform known for its simplicity, flexibility, and real-time control capabilities. It has gained widespread popularity due to its user-friendly development environment and extensive community support.
II. Positioning
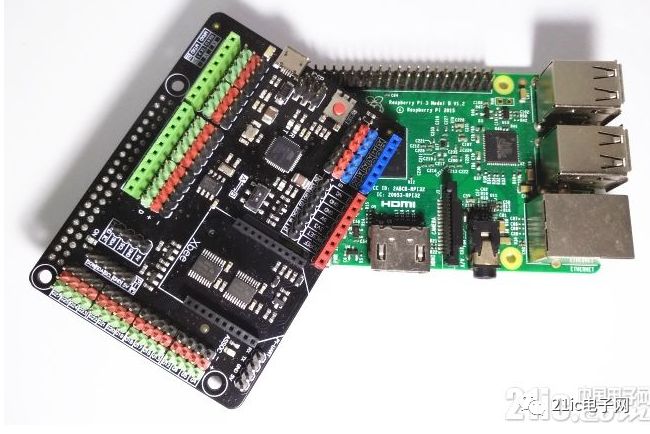
While Raspberry Pi offers strong computational power and advanced features, it has limited expansion capabilities for peripheral devices. In contrast, Arduino excels in interfacing with external sensors, actuators, and hardware components. This complementary nature between the two platforms makes them ideal for combined projects. To bridge this gap, DFROBOT introduced an expansion board that integrates an Arduino Leonardo with a Raspberry Pi interface, offering enhanced functionality and easier integration.
III. Unboxing
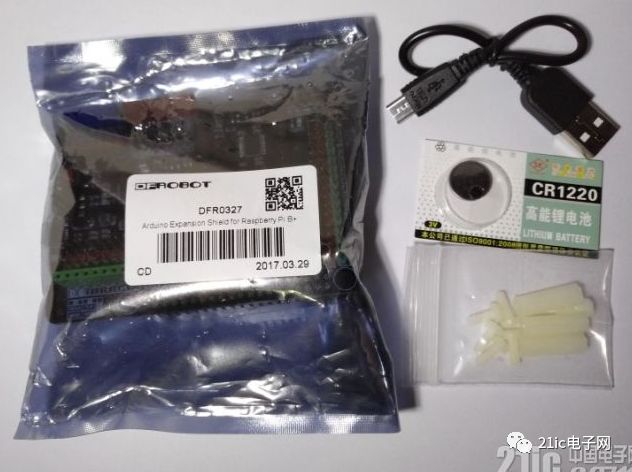
The Arduino Raspberry Pi expansion board comes in an anti-static bag along with a MicroUSB cable, a CR1220 button battery, and three plastic screws. The packaging is well-organized and easy to open. Inside, you’ll find the expansion board itself, which is designed for seamless compatibility with the Raspberry Pi.
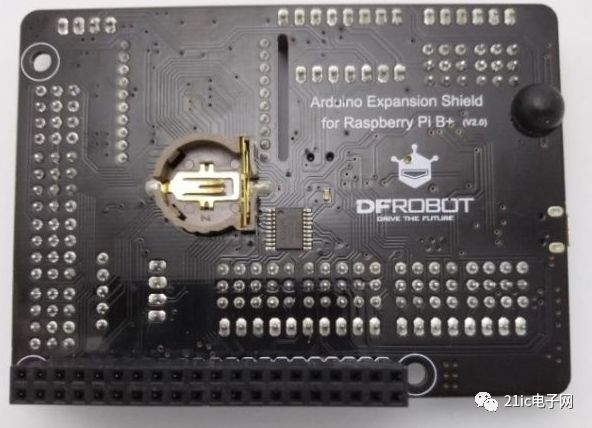
After opening the bag, the board is clearly visible, showcasing a clean and professional design. The backside also looks well-structured, with neatly arranged components and clear labeling of various ports and interfaces.
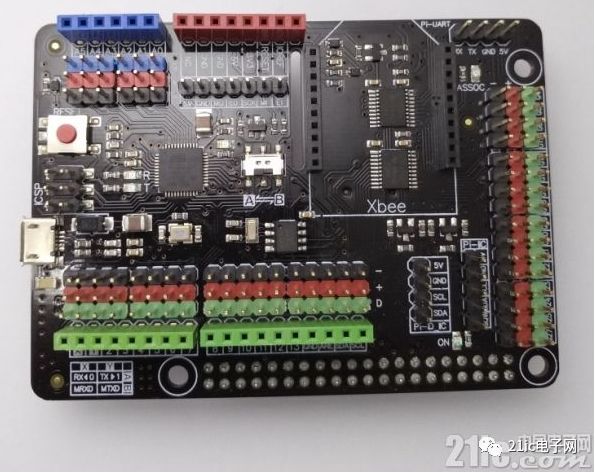
The board uses a black solder mask, with colored headers and rows to distinguish different functions. This makes it easy to identify each port and ensures a visually appealing layout.
IV. Product Function
This expansion board combines the Arduino Leonardo microcontroller with the Raspberry Pi interface, adding several useful features to enhance usability. Key functions include:
(1) Microcontroller: Atmega32u4
(2) Bootloader: Arduino Leonardo
(3) Working Voltage: 5V
(4) Digital I/O Pins: 20
(5) Analog I/O Pins: 6
(6) XBee Expansion Interface: 1
(7) Raspberry Pi GPIO Headers: 16
(8) I2C Bus Support
(9) SPI Bus Support
(10) TTL UART Serial Port
(11) Integrated RTC Clock
(12) Serial Port Switching Function
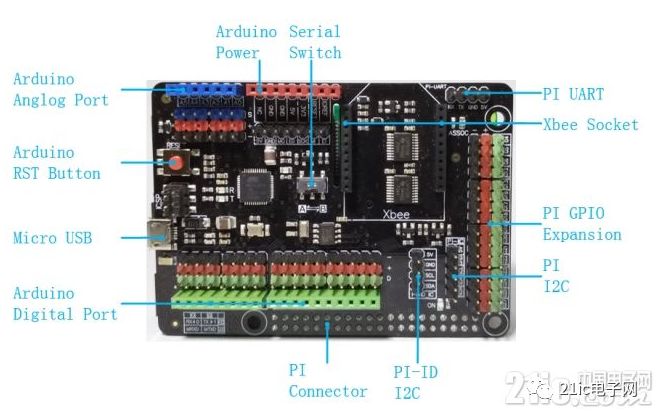
The board’s interface layout is well-documented and clearly labeled, making it easy to connect peripherals and expand the system’s capabilities.
V. Product Design
The expansion board has a rounded rectangular shape, slightly wider than the Raspberry Pi but similar in length. It includes three positioning holes that align perfectly with the Raspberry Pi’s mounting points, ensuring secure and stable installation.

Different colors are used for headers and rows to indicate their functions—blue for analog I/O, red for power, and green for digital I/O. This color-coding enhances usability and reduces the risk of connection errors.
A rubber pad is placed under the reset button to prevent accidental short circuits when connected to an RJ45 connector. Additionally, a cutout near the XBee interface allows for easy passage of FPC cables, ensuring no interference with Raspberry Pi peripherals.
All GPIOs are level-shifted, allowing users to choose between 5V or 3.3V depending on the peripheral requirements. A DIP switch is also included to select whether the serial communication is routed through the Raspberry Pi or the Arduino Leonardo itself.
Overall, the board’s design is both functional and aesthetically pleasing, with attention to detail evident in every aspect of its construction.
VI. Product Use Plan
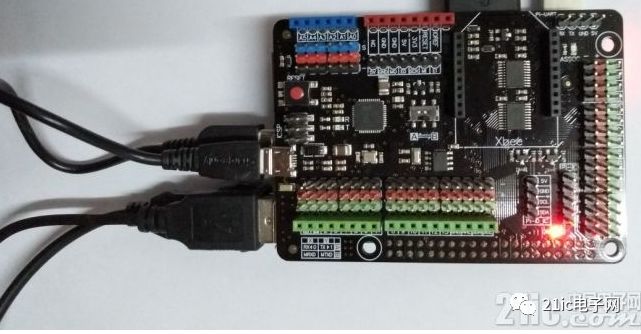
To get started, connect the Arduino Raspberry Pi expansion board to your Raspberry Pi using the provided USB cable. Power up the Raspberry Pi and connect a monitor, keyboard, and mouse.
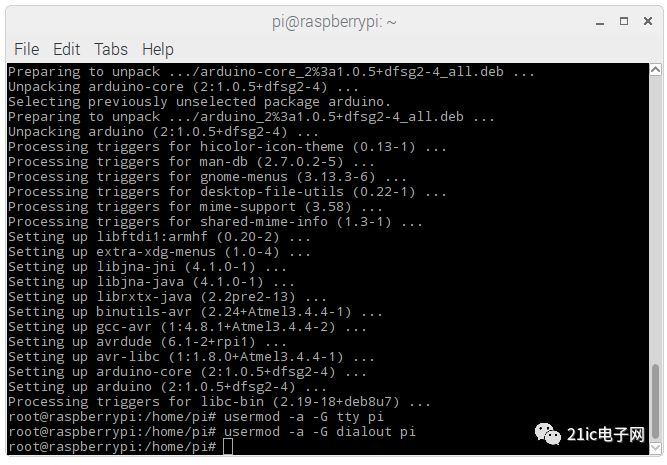
Next, install the Arduino IDE on the Raspberry Pi. Obtain root access and update the system before proceeding with the installation.
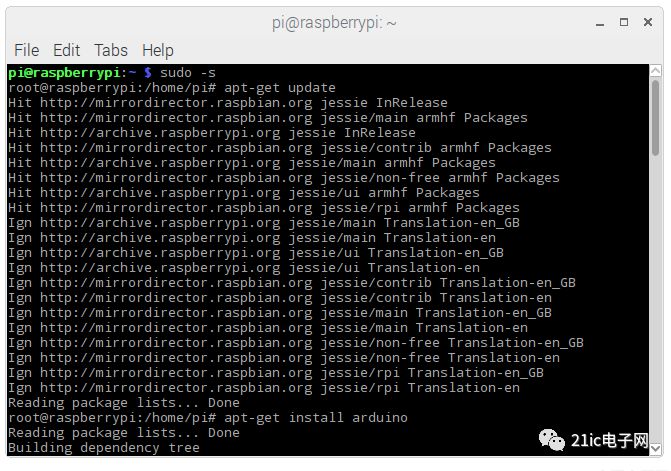
Once installed, add the PI user to the tty and dialout groups to enable serial communication.
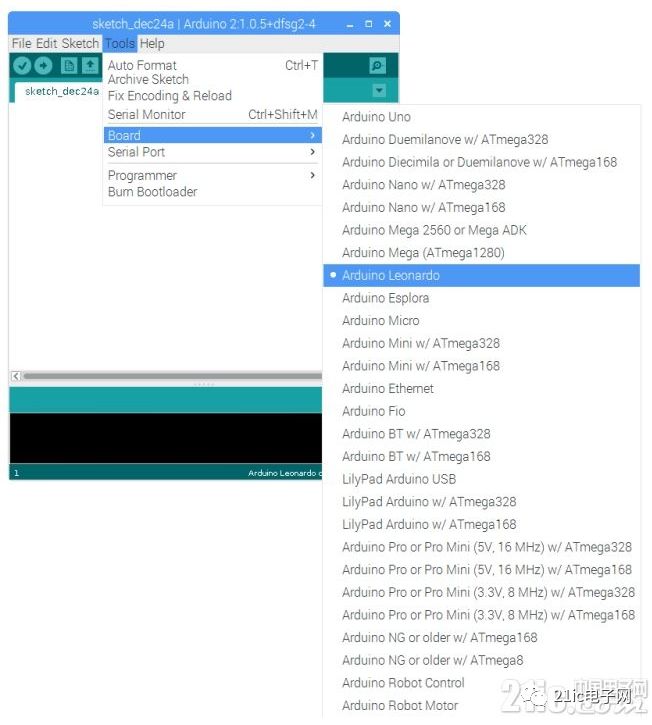
Open the Arduino IDE, select Arduino Leonardo as the board type, and set the serial port to ACM0.
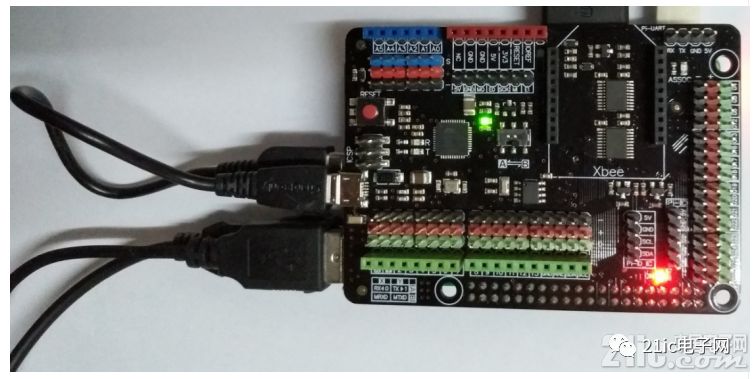
Upload a simple program to blink the LED connected to pin 13. Once uploaded, the green LED on the board should light up, confirming successful operation.
You can also use the Firmata protocol to communicate between the Raspberry Pi and Arduino, enabling more complex interactions. While this example doesn’t demonstrate all possibilities, it shows how straightforward it is to start working with the expansion board.
VII. Additional Information
DFROBOT provides detailed schematics, component placement diagrams, and interface descriptions, making it easier for users to understand the board’s structure. They also offer tutorials for both Raspberry Pi and Arduino, which are especially helpful for beginners looking to learn and experiment.
VIII. Summary and Outlook
Raspberry Pi and Arduino are two of the most popular open-source hardware platforms, each with its own strengths. Combining them through this expansion board offers a powerful solution for complex projects. The Raspberry Pi handles data processing and network tasks, while Arduino manages real-time control and sensor input. Together, they form a robust system suitable for a wide range of applications.
This expansion board simplifies the integration of both platforms, making it accessible for both Raspberry Pi enthusiasts and Arduino users. With its thoughtful design, ease of use, and high-quality build, it’s an excellent tool for makers looking to bring their creative ideas to life.
Co-extruded (double Wall) Heat Shrinkable Tubing
Co-extruded (double wall) heat shrinkable tubing
Co-extruded (double wall) heat shrinkable tubing,Heat-shrink tube,Heat shrinkable tubing,thermal contraction pipe,Shrink tube
Mianyang Dongyao New Material Co. , https://www.mydyxc.com