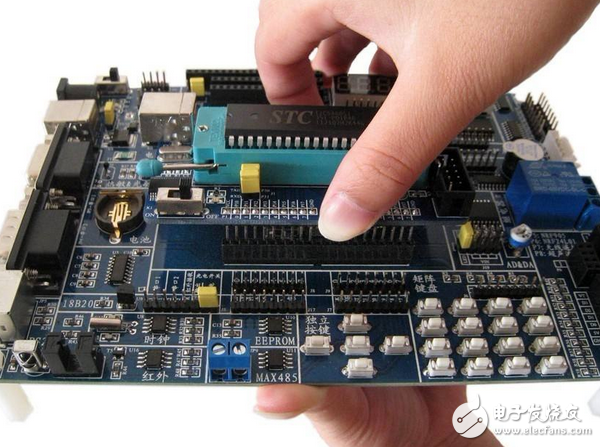
When we are learning a development board, a sample program, or a demo, we will find that this program design is a single peripheral or function, and the function implementation is successful. However, in the actual project design process, the programs that are often required to be designed are very large and complex, and the functions and project requirements of the project may be superb. At this time, in the program design, it is necessary for the MCU to take care of each peripheral at the same time without conflict, and to design the program structure reasonably, so that all the requirements can realize the related functions logically and clearly.
So the program design must have ideas. When we get a project demand, we can't knock the code as soon as we come up. Finally, the program logic written with the jumping thoughts stuns itself and has not yet achieved all the functions. Just like having a drawing before building a high-rise building, there must be a program structure before programming.
The program framework has nothing to do with the underlying layer. It focuses on the implementation and logical relationship of the overall requirements. For example, we refine a specific project requirement into 10 specific tasks, each of which performs some specific functions. Ignore the content of each task first, the 10 tasks and the switching logic between them constitute the program structure of this project.
With the programming framework, the next step is to implement the specific functions of each task. Different parts are written in separate modules. For example, the peripherals write a separate file, and the sensor driver separates a file. All the files are independent of each other. And when troubleshooting the problem, you can directly block a file and locate the problem more quickly.
With the idea, let's talk about the specific design steps. Suppose we get a specific project requirement book at this time. 1 project planningFirst, the requirements are split and divided into tasks, each task to achieve the corresponding part of the function, design the switching conditions between tasks. At this point, we don't consider the underlying layer at the moment, just list the logical switching relationship between all tasks and tasks, so that there is a program architecture, and then plan how many specific functions are needed in each task, list a table, or write an empty function. Let go first. After listing the specific functions of each task, we look back at the requirements book, whether all the functions are implemented, and the switching logic between them is very clear.
2 functional modularityAfter the first step is completed, the overall system architecture and logical relationship are clear. Next, we follow the function table of each task listed in the first step to complete the specific function implementation. At this point, don't rush to knock the code and continue planning. We know that for MCUs, usually all the functions are ultimately implemented by calling the underlying implementation. So next we have to plan how many underlying resources we need. According to the task-specific list of functions in the first article, we list an underlying driver table. For example, the function needs to use UART, SPI and other peripheral resources. All peripheral resources are listed as a peripheral table, which is all the peripheral resources that need to be used. If other drivers are needed, such as sensors, LCD, FLASH, etc., all devices list a device driver table.
3 writing peripheral driversWith the first and second steps from top to bottom, we should already be very clear about how this project requirements book becomes a code implementation. At this point, start writing the program, from the bottom up, layer by layer.
First, the driver corresponding to each peripheral should be written according to the peripheral table. Each peripheral driver is listed with a separate file. After the preparation, the verification function is normal. This step is similar to the development board sample program mentioned at the beginning of this article. If the same peripheral needs to implement several outputs or inputs at the same time, for example, three different IIC outputs are required, then it is normal to start the three-way IIC verification function at the same time, and there will be no interference between each channel.
Every time you write a driver, you must verify the function of each function in the driver. Only if there is no problem at the bottom, can it be packaged.
4 writing device driversBecause many of the device drivers are based on peripheral drivers, after writing the peripheral drivers, using peripheral-driven functions to implement device drivers, such as FLASH, may be SPI communication, then we must first write well SPI driver file, then call SPI driver file, write FLASH driver file, complete specific function functions, such as FLASH erase, read and write.
Similarly, each device driver is written to test each function.
5 other drivers are writtenPerhaps in the project, there are some things that are not related to the underlying, such as some encryption algorithms, complex data processing algorithms, various communication protocols, and so on. You can divide each class into a module, and you must verify the function of each function after writing or porting.
6 implement the function function in the taskAfter the driver files are ready, use the driver files, plus the necessary data processing, to complete each specific function in the task.
Again, every function function written is tested. Ensure that the function is implemented normally.
7 task testAfter completing step 6, test each task to see if it can achieve the functions required in the planning.
8 system testAfter completing step 7, the project is basically completed, because each layer is tested, so the whole system will not have much problem, but there may be some errors such as logic or resource conflicts. At this point, the entire system is tested repeatedly according to the functions required by the requirements book to find possible problems and further improve the program.
9 considerationsThere are other considerations throughout the design process, such as:
â— If you have a lot of interrupts, be sure to set a priority for each interrupt. Identify which priority should be prioritized.
â— Two interrupts of the same priority are prohibited from triggering the second interrupt in the first interrupt, and the program will be stuck.
â— Use less global variables, and the variables and states necessary for system operation can be placed in the structure. Then only define one structure variable.
â— When members of a structure are of different data types, member ordering is very important. Optimizing sorting saves a lot of memory.
â— When the structure is a formal parameter, in order to reduce the overhead of the stack space, it is better to set the formal parameters of the structure pointer type.
â— You cannot return a pointer to the stack space.
â— If the communication receives or sends no hardware FIFO, you can write a software FIFO to avoid packet loss.
â— All variables are initialized with specific values, especially local variables.
â— Define pointer type variables must be initialized.
â— Only use functions or global variables used in this file, you must add static.
â— The header file can only be declared and cannot be defined.
â— Be sure to add the appropriate comments, most of the time the code doesn't know what to watch.
â— Use data structures to store or process data, such as structures, enumerations, linked lists, queues, and more.
After reading these steps, do you think that the programming of complex projects is quite simple, so let's start the process of programming.
A TPU Screen Protector made of the super toughness of the honeycomb structure. Its unique ultra-soft properties allow it to cover the most complex curves and contours in a device.
The self-healing design of the Hydrogel Screen Protector can protect the display screen of the device from damage, leave no air bubbles, and maintain the sensitivity of the touch screen. Advanced anti-fingerprint and dust- and oleophobic overlays keep your screen smudge- and dirt-free. This overlay is also important in providing maximum touch sensitivity for improved high-speed glide and optimal touch response.
The optical transparency of the Hydrogel Film is more than 90%, showing you the most original screen color and bringing the most realistic visual experience.
If you want to know more about the product information of the Hydrogel Screen Protector for Xiaomi, please click the product details to view the parameters, model, picture, price and other information of the Xiaomi Screen Protector.
Whether you are a group or an individual, we will do our best to provide you with accurate and comprehensive information about Hydrogel Screen Protectors!
Srceen Protector For Xiaomi,Hydrogel Screen Protector For Xiaomi,TPU Screen Protector For Xiaomi,Hydrogel Film for Xiaomi
Shenzhen Jianjiantong Technology Co., Ltd. , https://www.jjthydrogelmachine.com