System Installation and Commissioning
Properly organizing the installation and commissioning procedures is essential to ensuring efficient and high-quality results. After a field inspection and necessary modifications, the overall process is illustrated in the figure below.
1. Early Technical Preparation
The more thorough the technical preparations before system installation and commissioning, the smoother the entire process will be. Key steps in this phase include:
(1) Reviewing all technical documentation, including random data and original specifications, to fully understand the system’s performance, functions, and operational requirements, and then developing detailed operating procedures.
(2) Gaining a deep understanding of the design data and the system process, especially the control requirements for each piece of production equipment. Based on this knowledge, it's important to create process flow diagrams, system connection diagrams, and logic operation diagrams for each subsystem. These visual tools are crucial for grasping the system’s logic and form an essential part of the early preparation stage.
(3) Familiarizing yourself with the performance, design, and installation details of each process equipment, particularly the control and power wiring diagrams. Compare these with actual devices to identify and correct any discrepancies promptly.
(4) Based on a comprehensive understanding of the design plan and PC technical data, compile a list of input and output points (including internal coils, I/O locations, corresponding equipment, and their functions).
(5) Study the program provided by the design team and draw timing diagrams for complex logical input and output points. This helps identify potential logic errors during the design phase.
(6) Develop a preliminary debugging plan and integrate it into a full system debugging schedule through collaborative discussions.
2. Equipment Inspection
A joint inspection between Party A and Party B should be conducted to verify the type, quantity, and specifications of all equipment, spare parts, technical documents, and accessories. The laboratory and on-site testing should confirm the performance of the items. Both parties should sign the inspection list once the results are confirmed.
3. Laboratory Debugging
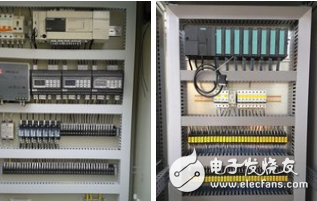
(1) Install the PLC on a metal bracket, secure the input and output modules of each workstation, and connect them to the host computer, programmer, and printer as per the installation summary. Ensure that all wiring is correct. Once the power supply matches the PLC voltage, follow the startup procedure to power up the system. Load the system configuration tape, confirm the setup, and load the programming tape. Then, perform various operational tests according to the operating procedure.
(2) Enter the working program.
(3) Perform analog I/O input and output, and check and modify the program. This step ensures the working program is correct, and the logic in the program aligns with the design process control requirements. It also checks whether the program can run smoothly. If there are mismatches or incomplete processes, it indicates an error, which must be corrected. During this process, your understanding of the program deepens, preparing you for on-site debugging. Any irrational or incomplete parts can be identified for further optimization.
There are two main debugging methods: 1) Simulation method: Build a test board based on the design, use toggle switches to simulate input nodes, small relays to mimic relays and contactors in the production equipment, and simulate return signals from auxiliary devices. This method offers realistic simulation, helping detect logical faults when mechanical contacts differ in switching speed from electronic contacts in the PLC. However, it increases costs and effort. 2) Forced method: Use the PLC's forced function to manually set mechanical contacts (switches) in the program to “on†or “off,†forcing the program to run. This method is less labor-intensive and cost-effective but provides limited logic verification. Manual forcing can only allow partial execution of the program.
Based on our on-site experience, we often use the simulation method for critical on-site nodes and the forced method for others, combining the strengths of both approaches.
During the logic verification phase, it's important to maintain a daily commissioning log, including details like the personnel involved, time, tasks performed, modification records, faults, and resolutions. This helps establish a clear responsibility system and keeps a record of the debugging process. For any changes made to the design program, mark them on the original drawings and consult the designer to ensure the design requirements are accurately reflected.
4. On-Site Installation and Inspection of the PLC
Once the laboratory commissioning is complete, move the equipment to the site for installation when conditions are favorable. Ensure that all components are properly installed, with plug-ins securely fastened using bolts. All communication cables should be of the same model and not mixed. If necessary, use instruments to check signal attenuation, ensuring it does not exceed the values specified in the technical data. Check the insulation resistance of the measuring host, I/O cabinets, and connecting cables, as well as the grounding resistance of the system. Verify the power supply and keep detailed records until all requirements are met, at which point the system can be powered on.
Digital Clamp Meter ,Digital Clamp Multimeter,Clamp Meter,Ac Clamp Meters
YINTE TOOLS (NINGBO) CO., LTD , https://www.yinte-tools.com